10 Best Bathroom Fittings Polishing Techniques for Buyers

Time:2026-09-07 Author:Sienna
0%

Choosing the right finish can change how a bathroom looks, feels, and performs over time. Bathroom Fittings Polishing is not merely about creating a bright surface. It involves material identification, abrasion control, cleaning chemistry, and careful inspection. A polished tap may look flawless under showroom lighting, yet reveal swirl marks beside a window. Small details matter.

The U.S. Environmental Protection Agency reports that WaterSense-labeled bathroom faucets use no more than 1.5 gallons per minute, compared with the federal standard of 2.2 gallons. This matters because polishing should never damage aerators, flow regulators, or protective coatings. The Houzz 2024 U.S. Bathroom Trends Study also shows continued investment in bathroom upgrades among renovating homeowners. That trend increases the need for finishes that remain attractive after repeated cleaning, not just on installation day.

Material knowledge is essential. Stainless steel, brass, chrome plating, nickel, and matte black coatings react differently to pads, compounds, moisture, and acidic cleaners. In practical buying inspections, a soft microfiber cloth can expose uneven gloss, while angled light can reveal fine haze. Ten polishing techniques are examined in this guide, from gentle hand polishing to controlled machine finishing. Each method includes suitable materials, likely risks, maintenance demands, and buyer-focused checks. No technique is universally best. A mirror finish can impress, but it may show fingerprints quickly. Some recommendations may need refinement as coatings and manufacturer instructions change. Always verify the supplier’s care guidance before testing any polishing product.
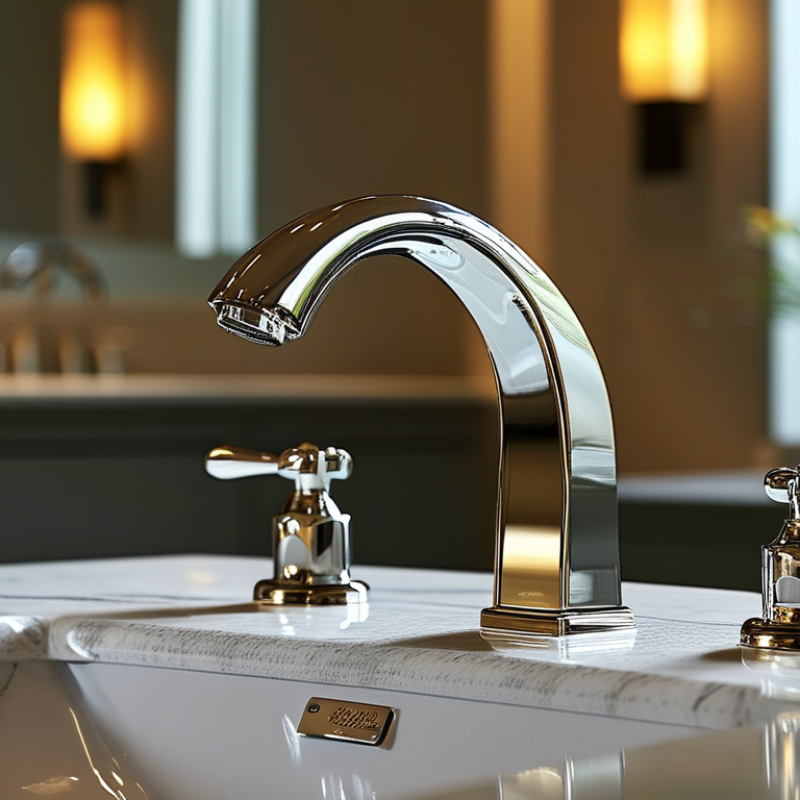
10 Best Bathroom Fittings Polishing Techniques for Buyers

Identify the Material and Finish of Your Bathroom Fittings

Before choosing a polishing method, identify the fitting’s base material and surface finish. A magnet can help, but it is not conclusive. Stainless steel may resist attraction, while brass and zinc alloys can look similar after plating. Check the product documentation, underside, fixing area, or an unseen edge. Look closely.

The finish changes the cleaning risk. Polished chrome has a reflective surface that shows water spots quickly, but harsh powders can scratch its plating. Brushed steel needs polishing along its grain, never in circles. PVD coatings are durable, yet abrasive pads may still damage their appearance. Lacquered brass should be treated gently because strong chemicals can cloud the protective layer. Start gently.

Use warm water, diluted mild soap, and a clean microfiber cloth for most fittings. Dry every joint afterward, especially around the aerator and handle base. For mineral deposits, soften the cloth rather than scraping the surface. Avoid mixing cleaning chemicals. A hidden-area test is worth the extra minute.

Buyers often focus on color and forget the material beneath it. That mistake can make a beautiful fitting difficult to maintain. Even experienced installers may misjudge a plated alloy by sight alone. Ask how the finish should be polished, how often it needs care, and whether replacement parts are available. A reliable seller should provide clear maintenance guidance, not vague promises.

Select a Safe Polishing Method for Each Surface Type

10 Best Bathroom Fittings Polishing Techniques for Buyers

Choosing a safe polishing method starts with identifying the surface, not the stain. Chrome fittings usually need warm water, mild soap, and a clean microfiber cloth. Dry them immediately to prevent water spots. Avoid abrasive powders, rough sponges, and aggressive scrubbing. They can leave fine scratches that become visible under bright bathroom lighting.

Stainless steel responds well to a diluted, pH-neutral cleaner. Wipe with the grain, never across it. For glass panels, use a soft cloth and a non-abrasive glass cleaner. Keep liquid away from seals and joints. Ceramic surfaces tolerate gentle cream cleaners, but metal tools can chip their glazed finish. Painted, brushed, or matte fittings require extra care. Polishing compounds may create uneven shiny patches.

Uncoated brass can develop a natural patina, so buyers should decide whether they prefer warmth or brightness. A suitable brass cleaner can work, but test it behind the fitting first. Plated brass is different and may lose its thin surface layer through repeated polishing. I once removed a dull mark with too much pressure and made the area look worse. That mistake changed my routine: use less product, wait longer, and inspect from several angles. Always follow the care instructions supplied with the fitting. If the finish feels rough, cloudy, or unusually thin, stop polishing and seek professional advice.

Prepare the Fittings and Work Area Before Polishing

Before polishing, inspect every fitting under bright, angled light. Look for water spots, hairline scratches, loose seams, and damaged plating. Different finishes need different care. Chrome tolerates mild soap, while brushed metal can show uneven grain marks. I have learned that polishing a dirty fitting spreads grit across the surface. Remove dust with warm water and a clean microfiber cloth. Protect nearby stone, grout, and painted surfaces with towels or plastic sheeting.

The U.S. Environmental Protection Agency’s WaterSense specification limits bathroom faucet flow to 1.5 gallons per minute, 30% less than the federal standard of 2.2 gallons. This makes controlled rinsing important during preparation. Do not leave water running unnecessarily. Shut off or cover the fitting’s aerator when practical, then dry the surface completely. A hidden test area is essential, even when the cleaner appears gentle. I once underestimated residue around a handle base; it dulled the final finish.

Tips: Prepare two cloths, not one. Use a soft brush for joints. Keep abrasive pads away from plated surfaces. Label cleaners before use. Follow the finish manufacturer’s care instructions where available. Houzz’s 2024 U.S. Bathroom Trends Study shows that homeowners continue investing in bathroom upgrades, but a polished appearance depends heavily on careful surface preparation. Rushing this stage remains an easy mistake.

10 Best Bathroom Fittings Polishing Techniques for Buyers - Prepare the Fittings and Work Area Before Polishing

No. Polishing Technique Suitable Fitting Surface Preparation Before Polishing Recommended Material or Tool Typical Working Method Main Benefit Key Buyer Safety Check
1 Warm Water and Mild Soap Cleaning Chrome-plated, stainless-steel, and glazed metal fittings Remove loose dust, hair, soap residue, and water droplets. Dry the surface with a soft cloth. Warm water, pH-neutral dish soap, microfiber cloth Wipe in straight or circular strokes with light pressure, then rinse and dry completely. Removes everyday soil without aggressive abrasion. Confirm that the cleaner is non-abrasive and free from bleach or strong acids.
2 Microfiber Dry Buffing Smooth chrome, polished stainless steel, and nickel-plated surfaces Clean the fitting first and make sure no grit remains on the surface or cloth. Clean, lint-free microfiber cloth Fold the cloth into a clean section and buff gently until water spots and fingerprints fade. Produces a clear shine with minimal risk of scratching. Do not reuse a cloth that has collected sand, mineral particles, or metal filings.
3 Diluted White Vinegar Descaling Uncoated stainless steel and acid-tolerant metal surfaces Test an inconspicuous area. Protect nearby stone, grout, seals, and unapproved coatings. Equal parts white vinegar and water, soft cloth, clean water Apply briefly to mineral deposits, wipe gently, rinse thoroughly, and dry immediately. Helps loosen calcium and limescale deposits. Avoid on marble, limestone, brass finishes, and surfaces restricted by the fitting instructions.
4 Baking Soda Paste Polishing Lightly soiled uncoated stainless steel and durable metal surfaces Remove loose grit and check whether the fitting has a lacquered, colored, or specialty coating. Baking soda, a small amount of water, soft cloth Make a thin paste, rub lightly in the grain direction, rinse fully, and dry. Provides mild mechanical cleaning for dull residue. Use minimal pressure because powder can create fine scratches on delicate finishes.
5 Non-Abrasive Metal Polish Bare brass, copper, or compatible stainless-steel surfaces Identify the base metal and determine whether a clear protective coating is present. Metal polish labeled for the specific metal, soft applicator cloth Apply a small amount, work a limited area, remove residue, and buff with a clean cloth. Restores brightness on compatible uncoated metal. Do not use on chrome plating or protective coatings unless the instructions specifically allow it.
6 Fine Non-Woven Hand Pad Brushed stainless steel and satin metal finishes Clean the surface and identify the existing grain direction before making any strokes. Fine-grade non-woven pad, water or approved mild cleaner Move only along the original grain with light, even passes. Can blend minor surface marks while preserving a directional satin appearance. Never use on mirror-polished chrome or glossy plated finishes.
7 Fine Wet Sanding Uncoated stainless steel with deep cosmetic marks Use only after gentler methods fail. Mask adjacent surfaces and test on a hidden area. Very fine wet-and-dry abrasive paper, clean water, microfiber cloth Keep the abrasive wet and sand with the metal grain using controlled, light strokes. May reduce visible fine scratches on suitable uncoated steel. Avoid on plated, lacquered, colored, or mirror-finished fittings because the coating may be removed.
8 Low-Speed Rotary Polishing Large, removable uncoated metal components Remove the fitting where practical, secure it safely, and cover the surrounding work area. Low-speed tool, soft cotton or microfiber wheel, compatible polish Use short passes with light pressure and keep the tool moving to control heat. Speeds up polishing on accessible, durable metal parts. Wear eye protection and avoid high speed, which can generate heat and damage finishes.
9 Steam-Assisted Residue Removal Heat-tolerant metal surfaces with soap film or greasy residue Check the fitting and surrounding materials for heat sensitivity. Keep electrical parts dry. Controlled steam cleaner, microfiber cloth, protective gloves Apply brief steam bursts, wipe loosened residue, then dry and buff the surface. Softens stubborn residue without abrasive powders. Avoid prolonged heat on plastic, adhesive, sealant, coated, or temperature-sensitive components.
10 Protective Final Buffing Clean, dry chrome, stainless steel, and compatible metal finishes Ensure all cleaner, polish, and mineral residue has been removed before applying protection. Manufacturer-approved protective product or dry microfiber cloth Apply a very thin layer if permitted, allow it to haze when required, and buff without overworking. Helps reduce fingerprints, moisture marks, and future residue buildup. Keep products away from aerators, cartridge openings, rubber seals, and slip-prone floors.
Preparation Checklist: Read the fitting-care instructions, ventilate the bathroom, remove loose dirt, protect nearby surfaces, use clean tools, test every method in an inconspicuous area, and rinse and dry the fitting after wet or chemical treatment.

Apply Polishing Techniques Step by Step

Before buying bathroom fittings, inspect the surface under bright, natural light.

Look for cloudy patches, fine scratches, uneven reflections, or dark marks around joints. These details often reveal careless polishing.

A reliable process begins with a clean, dry fitting. Remove dust with a soft microfiber cloth and warm water. Do not polish over grit. It can drag across the surface and create permanent lines.

Apply a small amount of surface-safe polish to the cloth, not directly onto the fitting. Work in gentle circles, then follow the fitting’s original grain if it has a brushed finish.

Use a separate corner of the cloth for rinsing and another for drying. On plated surfaces, keep pressure light and avoid abrasive powders, rough sponges, and strong acids.

Test an unseen area first. This small step prevents expensive disappointment.

I once polished a damp tap too quickly, and trapped moisture left dull rings near the base. The mistake was simple, but the lesson was useful.

For stubborn water spots, place a damp cloth over the area briefly, then wipe softly. Never scrape with metal tools. Check edges, handles, and threaded connections carefully, because residue collects there.

After polishing, inspect the fitting from several angles. A surface may look bright in one direction and hazy in another.

Buyers should also ask for care instructions and confirm whether the finish tolerates regular household cleaners. Claims of “maintenance-free” deserve a second look. Even quality fittings need gentle, consistent care.

Inspect, Clean, and Protect the Finished Surface

Inspect, Clean, and Protect the Finished Surface

A polished bathroom fitting can look perfect under showroom lights. Site conditions are less forgiving. Inspect each surface under angled light before installation. Look for cloudy patches, hairline scratches, uneven plating, or residue around joints. Run a clean cotton cloth across the finish. It should not snag.

Cleaning must match the material. Use warm water, mild detergent, and a soft microfiber cloth. Avoid abrasive pads, chlorine powder, and strong acids. They can dull chrome, stainless steel, or coated finishes. Rinse away soap film, then dry every edge.

According to EPA WaterSense faucet criteria, compliant lavatory faucets use no more than 1.5 gallons per minute at 60 psi. Lower flow does not prevent mineral deposits. Hard-water spots still need prompt removal.

NACE’s IMPACT study estimated global corrosion costs at $2.5 trillion, or about 3.4% of global GDP. That figure includes infrastructure, but it shows why surface protection deserves attention. I once trusted a “non-scratch” sponge and regretted it. Labels can be vague.

Tips:

Test cleaners on a hidden area first. Leave no chemical sitting on the surface. For buyers, request care instructions and finish-resistance test details. ASTM B117 salt-spray testing can indicate corrosion resistance, but it does not predict every bathroom condition. Check the test duration and substrate. A long test sounds impressive. It may still be incomplete. Inspect corners, drain rings, and concealed threads before accepting delivery.

FAQS

: How should I polish chrome bathroom fittings?

: Use warm water, mild soap, and a clean microfiber cloth. Dry the surface immediately. Avoid abrasive powders and rough sponges. Bright lights can reveal tiny scratches.

What is the safest method for stainless steel?

Use a diluted, pH-neutral cleaner. Wipe in the direction of the grain. Never scrub across it. This helps preserve the brushed appearance.

How should I clean glass panels?

Use a soft cloth and non-abrasive glass cleaner. Keep liquid away from seals and joints. Dry the edges carefully. Moisture may collect there.

Can ceramic fittings handle stronger cleaning tools?

Ceramic tolerates gentle cream cleaners. Avoid metal tools because they can chip the glazed finish. A small chip may spread later.

How do matte or painted fittings require special care?

Use light pressure and a soft cloth. Avoid polishing compounds because they may create uneven shiny patches. Matte surfaces show these patches clearly.

How should I treat brass surfaces?

Uncoated brass can develop a warm natural patina. Decide whether you prefer brightness or aging. Test brass cleaner behind the fitting first. Plated brass needs extra caution.

What should I do before polishing a fitting?

Inspect it under bright, natural light. Remove dust with warm water and a microfiber cloth. Never polish over grit. Small particles can create permanent lines.

How can I polish a stubborn water spot safely?

Place a damp cloth over the mark briefly. Then wipe softly. Never scrape with metal tools. Check the edges, handles, and threaded connections.

How much polish should I apply?

Apply a small amount to the cloth, not directly onto the fitting. Use gentle circles, then follow the original grain. Less product is usually safer.

What mistakes should buyers avoid?

Do not trust “maintenance-free” claims without checking care instructions. I once polished a damp fitting too quickly. Dull rings appeared near its base. That mistake changed my routine.

Conclusion

Bathroom Fittings Polishing begins with identifying the material and finish of each fitting, such as stainless steel, chrome, brass, ceramic, or coated surfaces. Since every material reacts differently, buyers should choose a polishing method that is gentle, suitable for the surface, and free from abrasive ingredients that may cause scratches or discoloration. Before starting, remove dust, water spots, and soap residue, protect nearby surfaces, and prepare soft cloths, suitable cleaners, and safety equipment.

Apply the selected polishing product in small sections with light, even movements, following the fitting’s surface direction when appropriate. Avoid excessive pressure, rough pads, and mixing different cleaning chemicals. After polishing, inspect the surface under good lighting to check for streaks, marks, or missed areas. Wipe away any remaining residue with a clean, damp cloth, dry the fitting thoroughly, and apply a suitable protective finish if needed. Regular gentle maintenance can help preserve the fitting’s appearance and reduce the need for intensive polishing.


Sienna

Sienna

Sienna is a skilled marketing professional with a deep expertise in our company’s core products and services. With a passion for innovation and detail, she plays a pivotal role in crafting insightful blog posts that not only highlight the unique features of our offerings but also provide valuable......